Easy Crochet Christmas Present Ornaments: Free Pattern
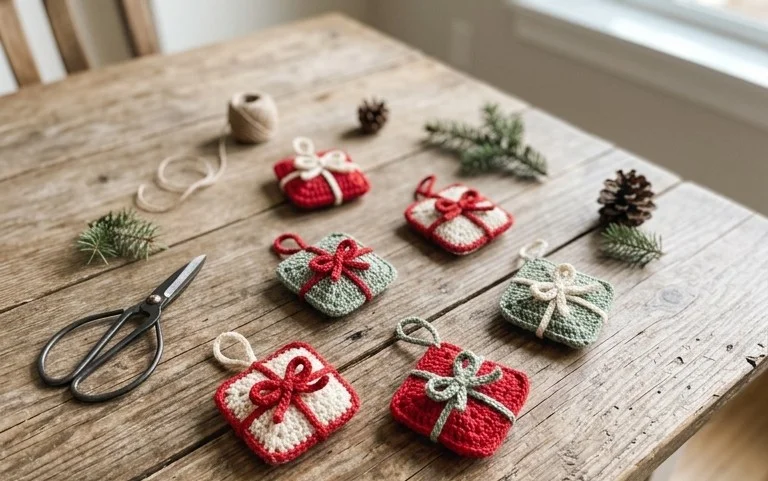
These hanging crochet gifts turn simple worsted yarn into charming tree decorations that feel soft and substantial in your hand. Beginners often appreciate how these ornaments use a familiar square construction to create a three-dimensional shape that mimics a tiny box tied with a bow. You can complete several in a single evening while sitting by the fire or listening to music, making them a thoughtful way to personalize your holiday tree or add a handmade touch to gift wrapping. This project teaches you how to join basic panels to create a hollow cube form that stands up on its own.
Why You’ll Love This Pattern
The Classic Crochet Granny Square is the foundation of countless heritage projects, offering a repetitive rhythm that is easy to memorize. Working in the round creates a dense, sturdy fabric that remains lightweight enough for blankets, bags, or decorative cushions. Because it uses clusters of double crochet stitches, it grows quickly, making it a satisfying project for those who want to see visible progress within a single sitting. You can complete one square in under thirty minutes, allowing you to build an entire collection of colorful motifs using small leftover balls of yarn.
I found the instructions easy to follow and the cluster technique resulted in perfectly flat squares every time I made one.
— Sarah, hobbyist crafter
Pattern Overview & Skill Level
- Skill Level: Beginner
- Approximate Time: 20–30 minutes per square
- Construction: Worked in joined rounds, starting from the center
- Finished Dimensions: Approximately 5 inches by 5 inches using medium weight yarn
Materials & Supplies Needed
- Yarn: Worsted weight (#4), 100% acrylic or wool blend, approximately 20 yards per square.
- Hook Size: 5.0 mm (H-8) crochet hook.
- Notions: Tapestry needle for weaving in ends, sharp scissors.
- Yarn Substitutions: Cotton yarn will result in a firmer, less drapey square and may require a slightly larger hook (5.5 mm) to maintain the same dimensions. Bulky weight yarn will increase the finished size significantly and require an 8.0 mm hook.
Stitch Guide & Abbreviations (US Terms)
- ch = chain
- st = stitch
- sl st = slip stitch
- dc = double crochet: Yarn over, insert hook into stitch, yarn over and pull up a loop, yarn over and pull through two loops, yarn over and pull through remaining two loops.
- dc cluster = a group of 3 dc stitches worked into the same space.
- sp = space (the hole created by a chain-1 or chain-2).
Step-by-Step Pattern Instructions
This pattern is worked in four rounds. Each round is joined with a slip stitch to the top of the first stitch of that round.
Round 1
- Start with a magic ring or ch 4 and sl st to the first chain to form a ring.
- Ch 3 (counts as first dc), work 2 dc into the ring.
- Ch 2, work 3 dc into the ring.
- Repeat step 3 two more times.
- Ch 2, sl st to the top of the beginning ch 3 to join. (12 dc, 4 ch-2 spaces)
Round 2
- Sl st into the next dc and into the first ch-2 space.
- Ch 3 (counts as dc), 2 dc in same space, ch 2, 3 dc in same space (this creates the first corner).
- Ch 1, move to the next ch-2 space and work 3 dc, ch 2, 3 dc in that space.
- Repeat step 3 for the remaining two corners.
- Ch 1, sl st to the top of the beginning ch 3 to join. (24 dc, 4 ch-2 spaces, 4 ch-1 spaces)
Round 3
- Sl st into the next dc and into the corner ch-2 space.
- Ch 3, 2 dc, ch 2, 3 dc in the same corner space.
- Ch 1, work 3 dc in the next ch-1 space.
- Ch 1, work 3 dc, ch 2, 3 dc in the next corner space.
- Repeat steps 3 and 4 around the square.
- Ch 1, sl st to the top of the beginning ch 3 to join. (36 dc, 4 ch-2 spaces, 8 ch-1 spaces)
Round 4
- Sl st into the next dc and into the corner ch-2 space.
- Ch 3, 2 dc, ch 2, 3 dc in the same corner space.
- Ch 1, work 3 dc in each of the next two ch-1 spaces, separated by ch 1.
- Ch 1, work 3 dc, ch 2, 3 dc in the next corner space.
- Repeat steps 3 and 4 around the square.
- Ch 1, sl st to the top of the beginning ch 3 to join, fasten off. (48 dc, 4 ch-2 spaces, 12 ch-1 spaces)
Care & Washing Instructions
- Hand wash in cool water using a mild wool-safe detergent to preserve fiber integrity.
- Lay the square flat on a clean towel to dry away from direct sunlight to prevent color fading.
- Reshape the square while damp by pulling gently on the corners to ensure they remain 90-degree angles.
Pro Tips & Common Mistakes to Avoid
- Consistent tension is vital; if your squares are curling, you are likely crocheting too tightly and should move up a hook size.
- Place a removable stitch marker in the top of your beginning chain-3 to easily identify the join point for the end of the round.
- Weave your yarn tails in horizontally through the back of the double crochet clusters to hide them completely without creating bulk.
- Adding more rounds will increase the size of the square proportionally, but remember that each additional round consumes roughly 25% more yarn than the previous one.
Frequently Asked Questions
Can I use a different weight of yarn for this pattern?
Yes, you can use any weight of yarn, but be sure to choose a hook size that corresponds to the yarn weight listed on the label to ensure the fabric remains flexible rather than stiff.
Is this project suitable for a complete beginner?
This pattern is ideal for beginners because it uses only double crochet stitches and chain spaces, which helps you practice uniform stitch height and corner formation.
How do I join these squares together?
You can join squares using a whip stitch with a tapestry needle or a single crochet seam through the back loops of both squares for a decorative, raised edge.
Am I allowed to sell items made from this pattern?
You are welcome to sell physical items made from this design, provided you credit the pattern designer in your product listing; however, you may not redistribute or sell the written pattern itself.
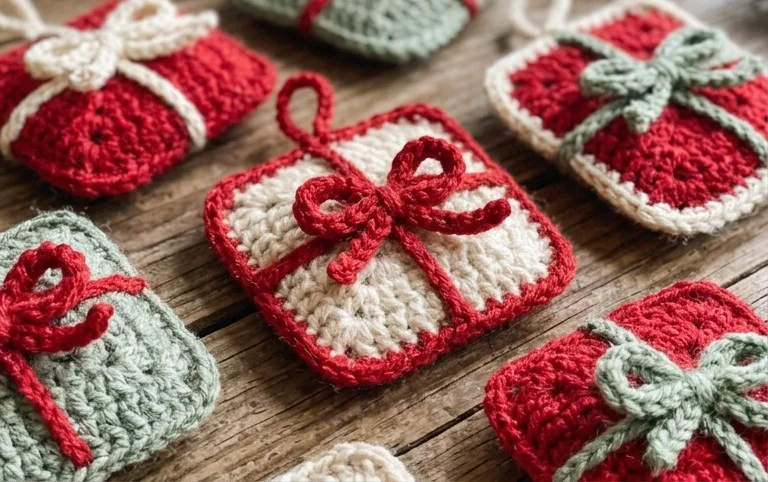
Your finished set of crocheted gifts creates a nostalgic display that brings personality to any evergreen branch. Try using velvet or metallic thread for an elegant variation that catches the twinkle of fairy lights differently than standard wool. Seeing how your colors come together is the most rewarding part of the process, so consider sharing a photo of your ornaments online to inspire other makers in the community. You can find more free seasonal projects and handmade ideas by browsing the rest of the project archives on this blog.