11 Easy Crochet Christmas Wind Spinner Free Patterns
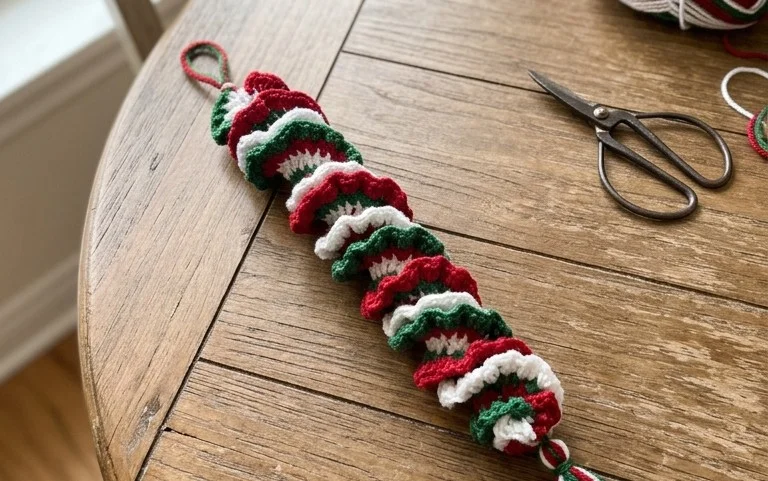
These hanging ornaments twirl gently in a breeze, creating a hypnotic dance of color against your window or holiday tree. Each spinner forms a compact, textured coil that feels satisfyingly firm in the hand and holds its spiral shape without sagging or losing definition. Beginners enjoy these projects because they focus on simple stitch repetitions that build confidence while creating impressive decor. You will learn to manage tension and execute continuous rounds, which keeps the surface smooth and seam-free. Whether you want to clear out your stash of festive yarn scraps or need a quick gift, this project delivers consistent results every single time.
Why Crocheters Love It
This beginner-friendly project works up in a single evening, making it a reliable choice for last-minute gifts or stash-busting. The design relies on basic single crochet stitches worked in a continuous spiral, which removes the need for visible seam lines. Because the pattern uses a tight tension, it creates a durable structure that holds its shape without needing complex internal supports. You can complete the entire project using less than 50 yards of yarn, allowing you to turn leftover scraps into polished, professional-looking home decor.
I managed to finish this project in under two hours while watching television. The instructions were easy to follow and the final piece looks much more complex than it actually is.
— Sarah, hobbyist crocheter
Pattern Overview & Skill Level
- Skill Level: Beginner
- Approximate Time: 1.5 to 2 hours
- Construction: Worked in continuous rounds from the base upward using a magic ring start.
- Finished Dimensions: 4 inches tall by 3 inches wide.
Materials & Supplies Needed
- Yarn: Worsted weight (#4) acrylic or cotton blend, approximately 45 yards.
- Hook Size: 4.0 mm (US G-6).
- Notions: Tapestry needle, stitch marker, fiberfill stuffing, scissors.
- Yarn Substitutions: You may use DK weight yarn for a smaller, more delicate result, or bulky weight yarn for a larger piece. Note that changing the weight will significantly alter the final dimensions and require you to adjust your stuffing amount to maintain the correct shape.
Stitch Guide & Abbreviations (US Terms)
- MR: Magic Ring. A technique to start rounds without a hole in the center.
- ch: Chain.
- sc: Single crochet. Insert hook, yarn over, pull up a loop, yarn over, pull through both loops.
- inc: Increase. Work 2 sc into the same stitch to add a stitch.
- dec: Decrease. Invisible decrease (insert hook into front loops of the next two stitches, yarn over, pull through both, yarn over, pull through remaining two loops).
- sl st: Slip stitch.
- st/sts: Stitch/stitches.
Step-by-Step Pattern Instructions
Body
- Rnd 1: Start 6 sc in a magic ring. (6 sts)
- Rnd 2: Work 2 sc in each st around. (12 sts)
- Rnd 3: Work 1 sc in the first st, inc in the next. Repeat 6 times. (18 sts)
- Rnd 4: Work 1 sc in the next 2 sts, inc in the next. Repeat 6 times. (24 sts)
- Rnd 5: Work 1 sc in each st around. (24 sts)
- Rnd 6: Work 1 sc in the next 3 sts, inc in the next. Repeat 6 times. (30 sts)
- Rnd 7-12: Work 1 sc in each st around. (30 sts)
- Rnd 13: Work 1 sc in the next 3 sts, dec. Repeat 6 times. (24 sts)
- Rnd 14: Work 1 sc in the next 2 sts, dec. Repeat 6 times. (18 sts)
Finishing and Assembly
Before closing the final rounds, begin filling the body firmly with fiberfill stuffing. Ensure the base is flat so the item stands upright.
- Rnd 15: Work 1 sc in the next st, dec. Repeat 6 times. (12 sts)
- Rnd 16: Work 6 dec. (6 sts)
Fasten off, leaving an 8-inch tail of yarn. Use your tapestry needle to weave the yarn through the front loops of the remaining 6 stitches and pull tight to close the opening. Secure the end and bury the remaining yarn inside the body.
Care & Washing Instructions
- Hand wash in cool water with a mild detergent to prevent the fiberfill from shifting.
- Lay the piece flat on a clean towel and reshape it while damp to ensure it retains its intended dimensions.
- Avoid wringing or twisting the piece, as this can distort the crochet stitches and damage the structure.
Pro Tips & Common Mistakes to Avoid
- Maintain consistent tension by holding the yarn taut and ensuring your hook size matches the yarn weight recommendations.
- Use a stitch marker at the beginning of every round to keep track of your progress without counting every stitch manually.
- Weave in your starting tail by threading it through the center of the magic ring and pulling it tight to ensure the bottom remains secure and closed.
- Adjust the height of the piece by adding or removing rounds of plain single crochet (Rnds 7-12) to suit your personal preference, keeping in mind that this will change the total yarn requirement.
Frequently Asked Questions
Can I use cotton yarn instead of acrylic?
Yes, cotton yarn works well for this pattern, though it has less elasticity than acrylic. You may find you need to increase your hook size by 0.5 mm to achieve a similar fabric density.
Is this pattern suitable for complete beginners?
This pattern is excellent for beginners because it uses only the single crochet stitch and emphasizes basic increase and decrease techniques, which are essential for all three-dimensional crochet projects.
How do I make the finished item larger?
To increase the size, use a thicker yarn weight paired with a larger hook. You can also add more increase rounds at the beginning, though you will need to adjust the subsequent plain rounds to ensure the shape remains proportional.
Am I allowed to sell items I make from this pattern?
You are welcome to sell finished items made from this pattern as long as you credit the designer. Please note that you may not sell or redistribute the written pattern itself under any circumstances.
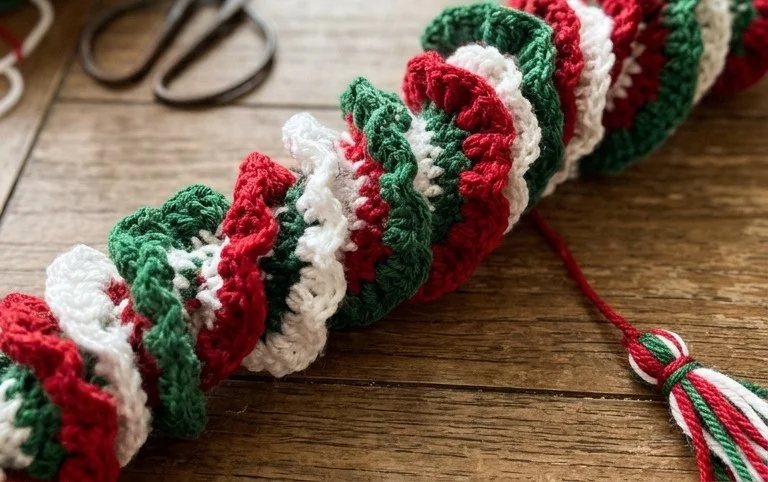
Your finished ornament will catch the light and add a playful movement to your holiday space. Try using metallic thread held alongside your main yarn for extra shimmer or adjust the chain count to create longer, more dramatic spirals. Seeing your work come to life is rewarding, so consider sharing a photo of your colorful display on your favorite social media site. You can find more free patterns and seasonal craft ideas on our main blog page whenever you are ready to start your next creative project.