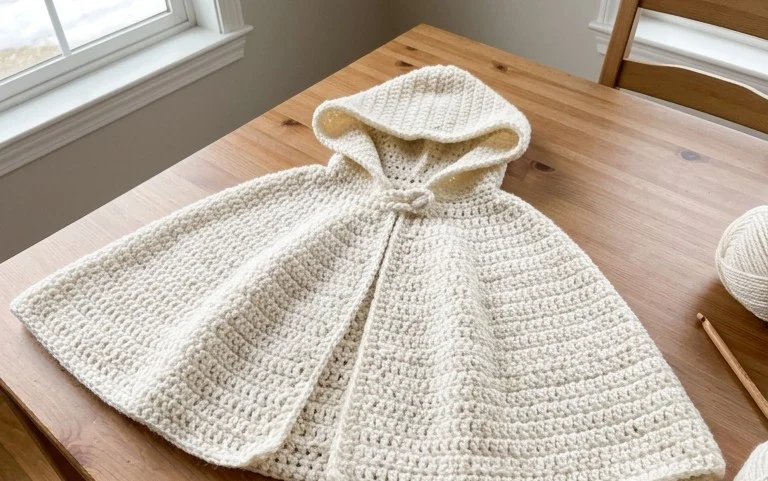
Snow Charming Cape: Free Crochet Pattern for Beginners
Soft yarn draped over your shoulders provides a layer of warmth during the coldest winter evenings. This project creates a structured garment that fits comfortably while moving with you throughout your day. Beginners will appreciate the clear repetition of stitches that builds confidence quickly. You will master the basic construction of a granny square motif that connects to form a flowing cape silhouette. By focusing on consistent tension, you achieve a clean finish that looks handmade rather than homemade. This cape serves as a layering staple for your wardrobe, offering a cozy experience that lasts for many years.
Why You’ll Love This Pattern
The Classic Crochet Granny Square is the fundamental building block of crochet design. This specific pattern focuses on a traditional five-round square, which creates a stable, symmetrical motif that lays perfectly flat. You will enjoy the meditative rhythm of the double crochet clusters that form the shell stitches, making this an ideal project for practicing consistent tension. Because each square works up in under twenty minutes, you can easily complete a small project like a coaster or a small pouch using leftover yarn ends from your stash.
I struggled with keeping my corners square until I tried this exact layout. The instructions for the chain spaces make all the difference in how the piece sits.
— Sarah, beginner crocheter
Pattern Overview & Skill Level
- Skill Level: Beginner
- Approximate Time: 15–20 minutes per square
- Construction: Worked in rounds from the center outward, turning the work is optional
- Finished Dimensions: 4 inches by 4 inches when using medium weight yarn and a 5.0 mm hook
Materials & Supplies Needed
- Yarn: Worsted weight (#4), acrylic or cotton blend, approximately 15 yards per square.
- Hook Size: 5.0 mm (H-8).
- Notions: Tapestry needle for weaving ends, sharp scissors.
- Yarn Substitutions: You can use DK weight yarn with a 4.0 mm hook for a smaller, 3-inch square, or bulky weight yarn with a 6.0 mm hook for a larger 5-inch square.
Stitch Guide & Abbreviations (US Terms)
- ch: Chain
- sl st: Slip stitch
- dc: Double crochet
- st/sts: Stitch/stitches
- sp: Space
- Cluster: A group of 3 dc stitches worked into the same space
- Shell: The corner formation consisting of 3 dc, ch 2, 3 dc
Step-by-Step Pattern Instructions
The Foundation
- Start: Ch 4, join with a sl st to the first ch to form a ring.
- Rnd 1: Ch 3 (counts as first dc), work 2 dc into ring, ch 2, *3 dc into ring, ch 2; repeat from * twice more. Join with sl st to top of beginning ch-3. (12 dc, 4 ch-2 spaces)
- Rnd 2: Sl st into the next two sts and into the first ch-2 corner space. Ch 3, (2 dc, ch 2, 3 dc) in same corner space. *Ch 1, skip 3 dc, (3 dc, ch 2, 3 dc) in next corner space; repeat from * twice more, ch 1, join with sl st to top of beginning ch-3. (24 dc, 4 ch-2 spaces, 4 ch-1 spaces)
- Rnd 3: Sl st into the next two sts and into the first ch-2 corner space. Ch 3, (2 dc, ch 2, 3 dc) in same corner space. *Ch 1, 3 dc in next ch-1 space, ch 1, (3 dc, ch 2, 3 dc) in next corner space; repeat from * twice more, ch 1, 3 dc in next ch-1 space, ch 1, join with sl st to top of beginning ch-3. (36 dc, 4 ch-2 spaces, 8 ch-1 spaces)
- Rnd 4: Sl st into the next two sts and into the first ch-2 corner space. Ch 3, (2 dc, ch 2, 3 dc) in same corner space. *[Ch 1, 3 dc in next ch-1 space] twice, ch 1, (3 dc, ch 2, 3 dc) in next corner space; repeat from * twice more, [ch 1, 3 dc in next ch-1 space] twice, ch 1, join with sl st to top of beginning ch-3. (48 dc, 4 ch-2 spaces, 12 ch-1 spaces)
- Rnd 5: Repeat the pattern of Rnd 4, adding one additional (3 dc in ch-1 space) group for every side. Join with a sl st to the first stitch, fasten off, and cut the yarn. (60 dc, 4 ch-2 spaces, 16 ch-1 spaces)
Finishing
To finish, pull the yarn tail through the final loop. Thread the tail onto a tapestry needle. Weave the yarn end through the back loops of the nearest stitches for approximately one inch to secure it, then trim the excess yarn flush with the work.
Care & Washing Instructions
- Hand wash in cool water with mild detergent to maintain shape and prevent fiber pilling.
- Lay flat on a clean towel to air dry, shaping the square into a perfect rectangle while damp.
- Avoid wringing or twisting the fabric as this can stretch the stitches and distort the corner spaces.
Pro Tips & Common Mistakes to Avoid
Maintain consistent tension by ensuring your yarn feed is smooth and not catching on the skein. Using a stitch marker in the first stitch of every round helps identify where to join, preventing accidental increases or decreases. When weaving in ends, follow the path of the yarn stitches to make the tail invisible on the right side of the fabric. To adjust the size of the square, simply repeat the Rnd 4 logic until the piece reaches your desired dimensions, noting that each additional round requires approximately 10 additional yards of yarn.
Frequently Asked Questions
Can I use a different yarn weight for this pattern?
Yes, you can use any yarn weight. Keep in mind that thinner yarn will result in a smaller square and thicker yarn will result in a larger square. Ensure you pair your yarn with a hook size appropriate for the fiber weight.
Is this square suitable for a beginner?
Absolutely. This pattern relies on basic double crochet stitches and chain spaces, which are the most essential skills to master for any new crocheter.
Can I sell the items I make using this pattern?
You may sell finished items made from this pattern as long as you provide credit to the designer. Do not sell the pattern document itself.
Why do my edges look wavy instead of straight?
Wavy edges are usually caused by an incorrect stitch count. If you accidentally add extra stitches in the chain spaces, the square will begin to ripple. Double-check your stitch count at the end of every round to ensure accuracy.
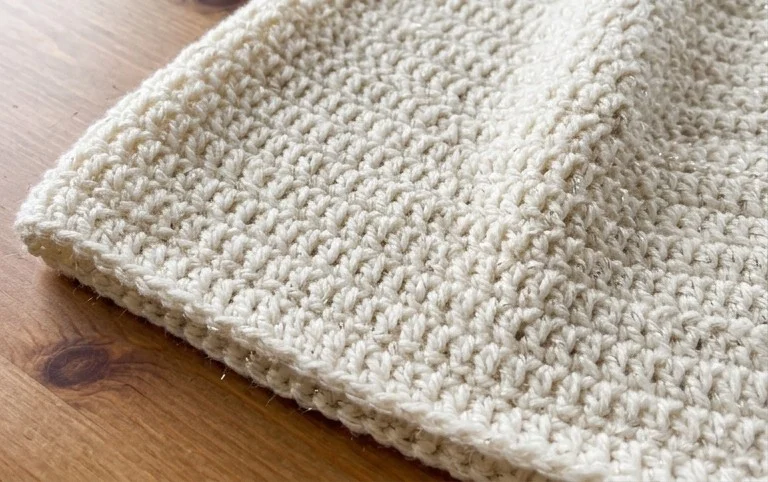
Your finished cape will become a favorite layer for chilly mornings spent indoors or quick errands outside. Consider switching to a bulky mohair blend if you prefer a softer, fuzzier texture against your skin. Sharing photos of your progress helps other makers find inspiration for their own yarn stashes. Post your finished work on your favorite social media platforms so we can see how your color choices turned out. Browse our library for more free patterns to find your next project today.